
It all started when my best friend called me in a panic. “Arya, my cousin’s wedding is tomorrow, and I need French tips, but I don’t have time to go to a salon. Help!” How could I say no? My dining table quickly became a mini nail salon, with polish bottles and cotton pads scattered everywhere. What began as a nail emergency became a messy but sweet bonding moment.
We laughed the whole night, swapping stories while working through smudges and polish spills. By the end, her nails looked flawless, perfect for a wedding. And I felt this rush of pride. That’s when it hit me. Doing French tips at home isn’t just possible. It’s fun and incredibly satisfying.
If you’ve ever wondered how to do French tips yourself while staying at home, let me tell you, it’s easier than it looks. You don’t need perfection. It’s all about patience, a little creativity, and understanding that slight imperfections like uneven tips or a small smudge are part of the learning process. As with any nail art, the more you practice, the better you’ll get.
So, whether you’re getting ready for a wedding, a date, or just want to feel fancy on a Tuesday, with my experience in beauty and fashion, I’ve got your back. I’ll guide you through every step to help you create flawless French tips from home. Trust me, you’ve got this!
Essential Tools and Materials for Perfect French Tips
Creating flawless French tips at home is easier than you think. In my years of perfecting French tips at home, I’ve learned that you don’t need an array of expensive tools. Just a few key essentials that get the job done right every time. A few must-haves can make the process simple and fun.
Nail Files and Buffers
A high-quality nail file and buffer are essential for shaping nails with precision and creating a smooth, even surface that allows your French tips to adhere seamlessly. Shaped, smooth nails are the base for any great French manicure. I recommend using a fine-grit file because it’s gentle and won’t cause splits. A good buffer is your secret weapon! It gives your nails a smooth surface, so the polish goes on perfectly every time.
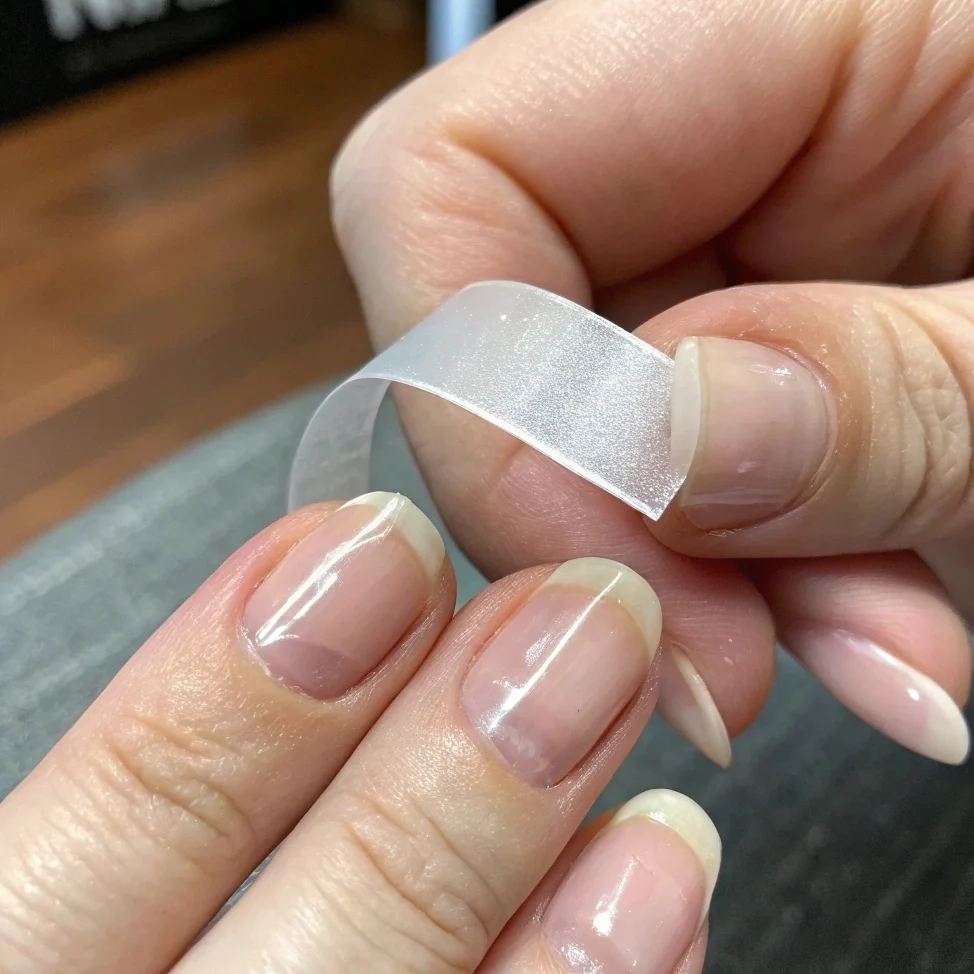
Tape for Precise French Tips
If painting straight lines feels impossible, you’re not alone! Tape is a key player. While household tape can work in a pinch, it’s best to use specifically designed nail guides or striping tape to avoid potential residue or peeling. Stick the tape on your nail, leave the tip exposed, and paint away. Easy, stress-free, and professional-looking.
Base and Top Coats
Here’s my golden rule: never skip the base and top coats. A base coat not only protects your nails from staining and enhances polish adhesion but also nourishes your nails, offering a protective barrier. The top coat locks everything in, gives your nails a shiny finish, and keeps your manicure looking fresh for days. Pick formulas that promise durability.
Choosing the Right Polish Colors
Classic shades like sheer pink or nude with white tips are so classic and suitable for any event. These colors can effortlessly transition from day to night and complement various outfits. But don’t be afraid to mix it up. Soft pastels or bold shades can add a modern twist. Just make sure the colors match your vibe and complement each other.
Preparing Your Nails for a Flawless French Manicure
Cleaning and Shaping Your Nails
Before painting, start with clean nails. Removing old polish with an acetone-free remover is generally gentler on nails and cuticles, but ensure the product is also free from alcohol and other harsh chemicals. Once your nails are bare, wash your hands and dry them completely.
Now shaping! Whether you prefer square, almond, or round shapes, make sure all your nails are even. Taking your time here will make those French tips stand out and ensure a more even and accurate application.
Cuticle Care and Maintenance
Skipping cuticle care is a big mistake. Start by soaking your fingers in warm water for a few minutes. It softens the cuticles. After that, gently push back the cuticles with an orange stick. Be gentle, no harsh tools!
If you see dead skin, carefully nip it off, but don’t overdo it. This simple routine helps maintain the health of your cuticles, preventing hangnails and keeping your nails looking neat and polished. You’ll love how professional they look after just a few minutes.
Buffing for a Smooth Finish
Use a nail buffer to gently smooth the surface of your nails, but avoid over-buffing, as it can weaken your nail surface over time. This step adds a natural shine and helps the polish stick better. A smooth base makes all the difference for a long-lasting French manicure.
Once you’re done buffing, wipe your nails with a bit of polish remover. It gets rid of oils or dust and sets the stage for perfection.
Techniques for Creating the Perfect French Tip
Creating the perfect French tip at home can feel tricky, but with the right tricks, you can nail that salon look. The French tip is a timeless nail art style that never goes out of fashion. Here’s how to do French tips easily at home.
Using Nail Art Brushes

Nail art brushes are a must for French tips, and I love them. They give you control and make drawing the tip a breeze. A thin-tipped brush or an angled liner brush is ideal for precision. Brushes made with synthetic fibers provide more control and smooth application, especially for intricate designs like French tips. Experimenting with different nail techniques, I can tell you it might take a little practice, but once you’ve got it, you’ll feel like a pro.
Here’s my quick step-by-step:
- Dip your brush into your polish color.
- Steady your hand on a flat surface.
- Carefully draw a clean line along the tip, gently following the natural curve of your nail.
- Fill in the tip if needed, then let it dry.
- Seal it with a top coat for that glossy finish.
Using Tape for Precise French Tips
If freehand painting feels tricky, like it often does for me, tape is the way to go. It’s cheap, easy, and gives you clean, sharp French tips. Plus, it saves you a lot of stress.
Here’s how you can do it:
- Start with a base coat and let it dry all the way.
- Cut small pieces of thin tape (painter’s tape or nail striping tape works best).
- Place the tape on your nail at an angle to set the width of your tip.
- Press the tape down firmly to keep the polish from leaking underneath.
- Paint your tip color over the uncovered part of the nail.
- Remove the tape while the polish is still a little wet for a cleaner line.
- Let the tips dry fully before adding a top coat.
Applying French Tip Guides
For those who prefer precision over freehand, French tip guides are a game-changer. These stickers or stencils, often used by professionals, allow you to create clean, crisp lines with ease These precision stickers or stencils help create perfectly defined lines with minimal effort, making them a great tool for achieving flawless French tips. Place the guide at the edge of your nail, paint over the exposed area with your favorite polish, and gently peel away the guide once the polish is dry. For the best results, I recommend using high-quality adhesive guides to prevent any smudging or lifting.
Freehand Techniques for Precision

Once you’re comfortable with using guides, you might want to try freehand techniques for a more personalized look. Freehand is a great way to experiment with your design and take your nail art to the next level. I love the challenge. Start with a steady hand and know exactly where you want the line. If you’re new to it, don’t worry. Practice will help! Before jumping straight onto your nails, practice your freehand lines on a piece of paper. It helps refine your technique and boost your confidence. Patience is key! Don’t stress if it’s not perfect at first. I always use a small brush to fix any uneven edges, and soon you’ll be rocking those tips like a pro!
Adding a Personal Touch to Your French Tips
Incorporating Nail Art Designs
When I want to make my French tip nail designs feel more “me,” I love adding simple nail art. It’s easy, whether it’s small, delicate flowers, simple geometric shapes, or a pop of glitter. These timeless additions work in all seasons and can instantly update your French tips. As I experimented with countless nail designs over the years, I can tell you that even tiny dots or simple stripes can elevate your French tips and make them feel more personalized.
Experimenting with Colors and Textures
Who says French tips have to stay white? One of my favorite ways to mix it up with colors is with bold shades, metallics, or even pastels for a softer twist. Experimenting with high-quality nail polishes and gel formulas can elevate your French tips, offering better durability and a smoother finish. Textures matter too, like matte, shiny, or velvety. Combining contrasting colors, like a matte base with a glossy tip, or experimenting with velvet textures can give your French tips a more stylish, custom feel that speaks to your style.
Maintaining Your French Manicure at Home
Tips for Long Lasting Wear

To keep my nails shiny, I always apply a top coat every few days. This one step can help my French manicure last longer. If you’re like me, you know how hard household chores can be on nails. That’s why I recommend wearing gloves when doing tasks like washing dishes. Gloves protect your nails from the damaging effects of water, soaps, and harsh chemicals, all of which can weaken the polish and lead to quicker wear.
Avoiding Common Mistakes

One mistake I used to make was forgetting to seal the edges of my nails with polish. This led to chipping faster. Now, I always make sure to apply polish to the tips of my nails, not just the top. Sealing the nail edge helps prevent water or oils from creeping under the polish, which is a major cause of chipping. Whether you’ve used your nails to open packages or scrape stubborn labels, you know how easily those actions can wreck a perfect manicure. I try to avoid that at all costs!
Touch-Up Techniques

If I spot any chips or smudges, I don’t stress. It’s super easy to fix them with a few simple touch-ups, whether you’re working with gel polish, regular lacquer, or even dip powder. For smudges, I use a small brush dipped in nail polish remover to clean up the area. For chips, I carefully apply a thin layer of matching polish to the chipped area, then smooth it out with a nail buffer before finishing with a top coat for seamless coverage. It’s such an easy fix, and it keeps my French manicure looking fresh for days!
Wrapping It Up
And that’s a wrap, ladies! French tips at home are doable. With some patience and the right tools, like a quality French tip guide or precision brush. You can achieve a salon-quality look right at home. If you’re thinking about how to do a French manicure on your own, it’s just about finding the technique that suits you. Don’t worry if it’s not perfect at first. Trust me, as someone who has tried a lot of nail designs, I can tell you that perfection comes with practice. Everyone starts somewhere! With enough practice and the right mindset, you’ll soon be creating flawless French tips with ease. Keep trying out new techniques until you find your groove. It’s all part of the fun. Happy painting, and enjoy showing off your gorgeous nails!
Get into the holiday spirit with classic French tip nail ideas:
A lover of all things fashion and beauty. I’ve been captivated by the magic of fabrics, colors, and makeup that let us express our inner selves. From my first sketchbook full of outfit ideas to discovering the perfect shade of lipstick, fashion has always been my happy place. With years of experience writing in the fashion and beauty industry, I’ve had the joy of collaborating with top brands and sharing my expertise through styling tips, beauty tutorials, and trend forecasts.


